How to Uninstall PreVa Easily and Thoroughly
It is very common for people encountering some troubles while they are going to uninstall PreVa on the computer, such as program still can be found on the PC after the removal, or it does not allow to uninstall and etc., many people and you maybe want to know the exact and effective way to get rid of this application on computer, and you will get the workable and proper solution from here.
Why does PreVa cannot be removed smoothly?
People may have confusion about the PreVa removing problem while most of them just think that the program removal is an easy job to accomplish. But actually, because of the improper or un-thorough removal for this application, it has been a common issue for the people needing to resolve on the computer, and the following two situations are often the causes of the removing problem:
Download Windows Auto Uninstaller
Common problem of incomplete removal
Different from the more and more genuine programs being created by many professionals, it seems like more difficult for people to remove a program completely with the program's owned remover or the Windows uninstall utility. And the main cause of this problem is the two processes are often limited in cleaning the components initially installed on the computer, but not include those created during the use of the application, and additionally, associated registry files in the system are also ignored by the traditional removing process.
Therefore, many people may find that they still can see the shortcut, related features of PreVa on their computers after the removal. To uninstall PreVa completely without any further issue, here are some good ideas and methods you can refer to.
Remove PreVa with its owned uninstall process or Windows uninstall utility
Uninstall with its owned uninstall processMany programs will install on the computer with its specific uninstall process, which can be found in the program install folder. To uninstall PreVa in this way, please open its install folder, or locate its shortcuts on the start menu, click to activate its uninstall process, and follow the instructions to finish the removal.

Add/Remove programs is the Windows uninstall utility that often used by many computer users to clean out any unwanted programs. The detailed steps to get rid of PreVa are:
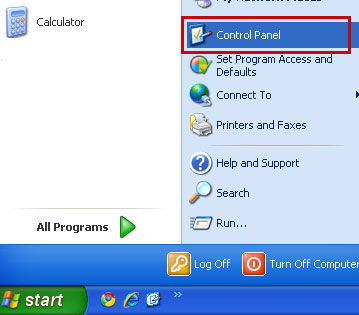
- 1. Click on Start > Control Panel > Add/Remove programs
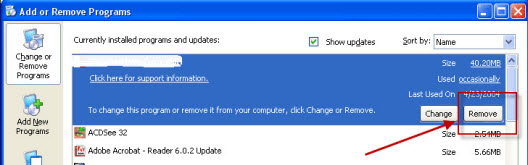
- 2. Locate the Add/Remove programs on its program list, click the remove button
- 3. Finish the removing process with guides
Attention! Additional manual removal need to be performed. Many people may be very familiar with these two uninstall ways, otherwise, the complete removal does not accomplish after performing the above instructions, as we have mentioned above, associated components of PreVa application are not cleaned up thoroughly, so after that, you should go to check and remove all of leftovers manually.
Related registry entries are often forgotten by these two removing uninstall processes, they store on the Windows system that will always consume the precious system space and resource, and affect the effective performance of the computer. To completely remove PreVa and optimize the system as well, you should open the Registry Editor to remove all of related registry components manually. Please be cautious for the removal and do not mistakenly remove other important Windows system registry, or further serious problems will be triggered.
Mostly recommended: remove PreVa with professional Special Uninstall
Do you feel very troublesome to manually registry leftovers? Are you afraid to make any mistakes on the Windows system registry? If you are not a computer professional and just want to uninstall PreVa and other programs quickly and completely, it is suggested to use a sophisticated uninstall tool like Special Uninstall, and you will benefit a lot from this third party remover comparing to the traditional removing ways:
Steps to uninstall PreVa with Special Uninstall
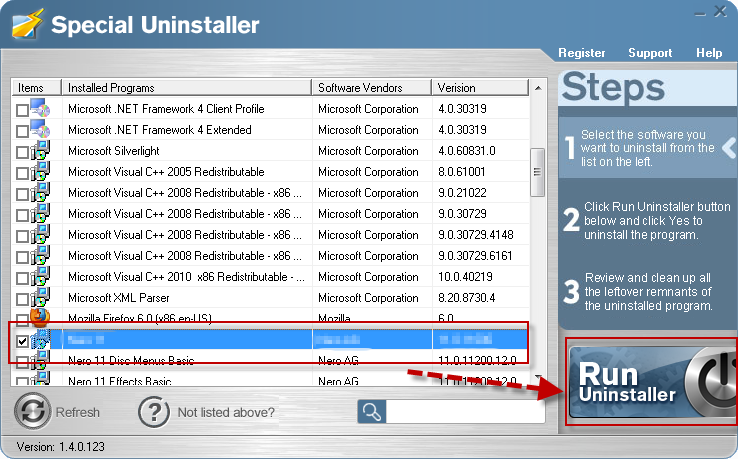
- 1. Open this uninstall tool, and select PreVa on its program list, click Run Uninstaller
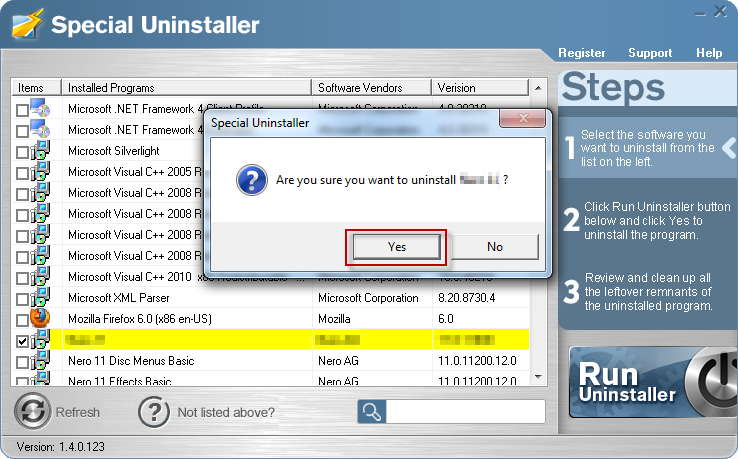
- 2. Click Yes to confirm the uninstallation
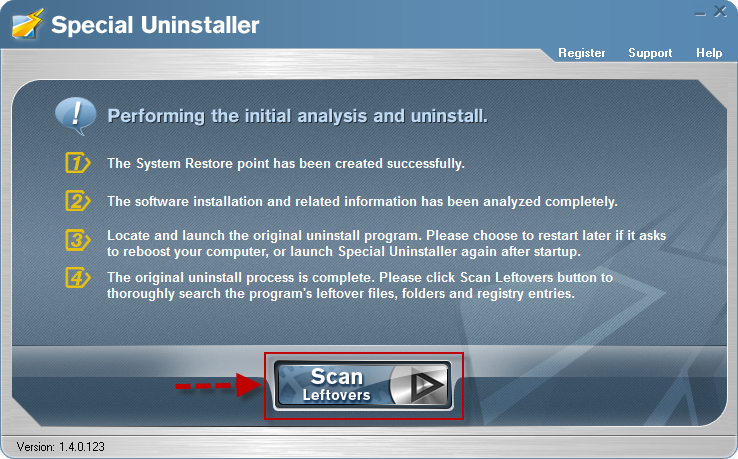
- 3. Complete the standard uninstall process, and click to Scan Leftovers Choose to remove all of leftovers on your PC
- 4. Click OK to finish the removal, restart your computer
More information about complete removal
Program removal in Windows XPRegistry Cleaner